
Exterior walls being pulled down with the sinking slab
This home is built up on poles, like many homes at the beach. A thick concrete slab was poured under the home when it was built. Sometimes this area is used as a garage or car port, in this home is was finished like a basement and used as living space, a family room I believe.

Fully separated from the rest of the house
The sandy soils in Accomack County are a big factor to consider when fixing a severe foundation problem. It is true that the immediate cost of just destroying and replacing the concrete slab is cheaper, but the long term cost will most likely be more than a slab pier system. Slab piers are a permanent solution, ripping up the old slab and re-pouring a new one is like a bandage on crack in the Hoover Dam. The new slab is just going to sink like the old one did. How many times do you want to fix this problem? Look at the rest of this album and you will see that its not just the floor that needed to be fixed. The homeowners had to remove carpet, drywall, and all the furniture. The drywall cracked because it was being pulled down while still attached at the top of the wall. The good news is that once the slab piers are finished, all of the other stuff will be secure as well.

Drilling the holes for slab pier installation
This is the biggest difference between push piers and slab piers. Push piers require larger holes and excavation down the the footer while a slab pier gets a smaller hole and less excavation. Each pier position has a hole drilled and then workers remove a little of the dirt below to make room for the bracket. Most slab pier projects require several holes and several brackets to be spread out throughout the work area.

Keeping the work area clean
While one crew member drills a hole for the slab pier, a second crew member will vacuum the dirt and debris from around the drill sight. This keeps the area clear for the driller to see and also keeps dust out of the air as much as possible.

Keeping the concrete wet while drilling
A slow stream of water is applied during the drilling process. This will help the drill bit and keep it from binding up. It also wets the dust and dirt for easy removal.

Installing the bracket for a slab pier
The bracket for a slab pier is quite different from other systems. It is round and designed to apply pressure evenly to the slab when the piers are installed. A slab pier is inserted in the center of the bracket instead of on the outside edge like a push pier.

Pushing the piers into the ground
Each section of pier looks like a big steel tube. They are separated into section like that because most ceilings are 7-8 feet and it would nearly impossible to get a long section into the ground. Also, each section is slowly pushed in and closely monitored, once the pier reaches a desired resistance or depth it is closed off. This process is repeated for each location. It is a slow and deliberate process, if it was rushed it might cause a new problem.

Finishing off the slab piers
Once each of the piers is in the ground, a crew member will place a cap on and fill in the holes with cement. The entire process will only leave small circles or noticeably different colored concrete. There is no large steel poles sticking out of the ground, and the homeowner can replace the carpet and begin to use their room again the very next day.
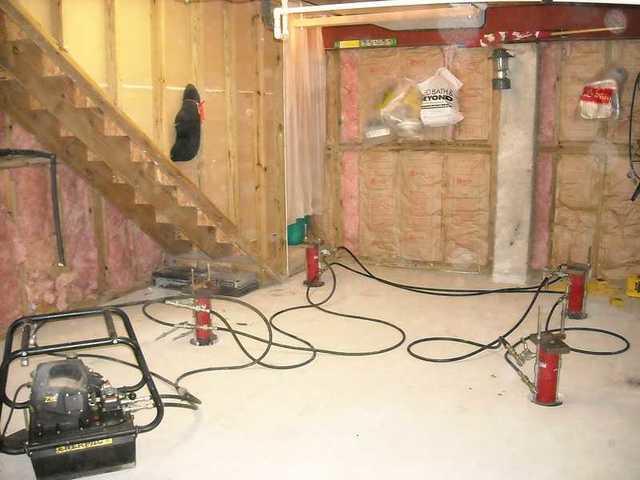
Hooking up the lifting equipment
Since you would never want to put a lot of pressure on one pier, several piers are connected together for the lifting process. This ensures an evenly distributed load and an even lift.
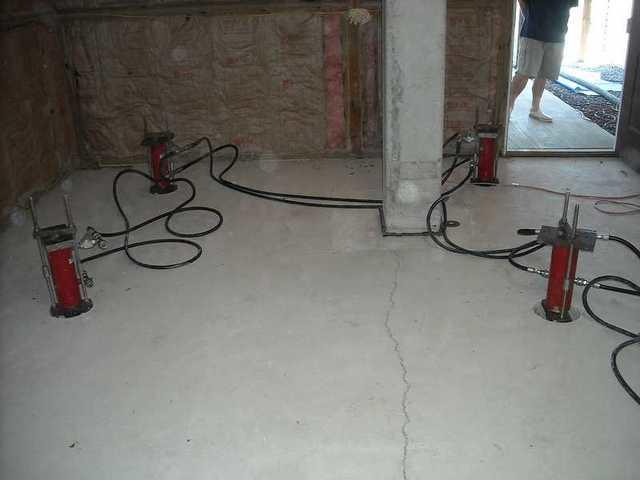
Lifting another section
Often times the crew will switch the equipment from one section of floor to another, especially if the floor has sunk several inches. This floor was in bad shape, so the lift took quite a while. In the end the crew was able to achieve almost full recovery.
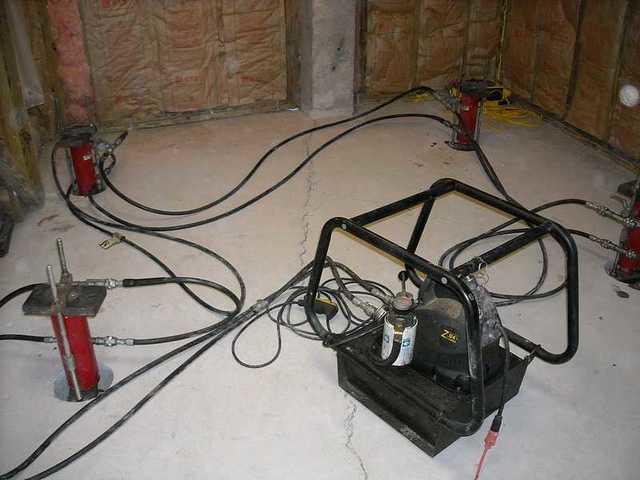
Lifting the piers with hydraulics
DryZone uses special equipment to lift the piers and concrete slab. This is a floor in a home, but it could easily be a garage floor or a driveway. Sometimes, sections of road are lifted using this same process.
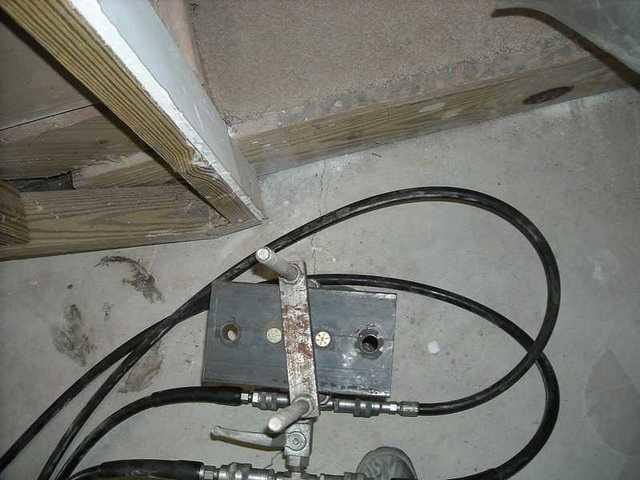
Looking down at the top of one of the brackets
Heavy duty steel brackets ensure that the equipment works every time. These cylinders are stored properly after every job so that when it comes time for the next project they are ready to go. The hoses are checked and replaced as needed.
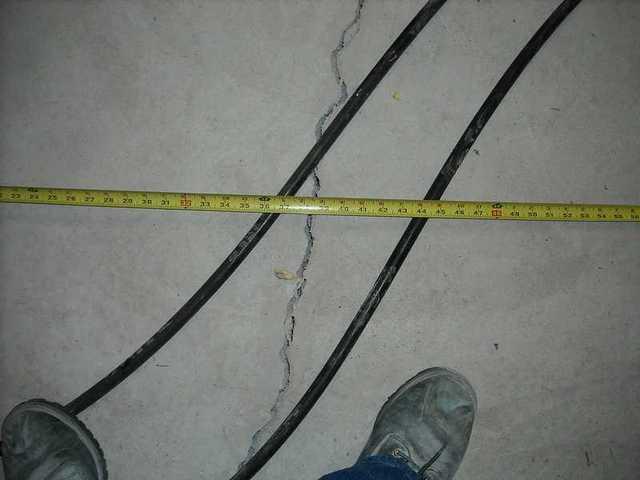
Measuring the foundation crack
When a slab floor sinks into the ground it will often crack. This floor sank several inches and the crack was quite large. In this picture one of the crew members is measuring the crack before (and again after) the lift. to document the changes. DryZone keeps records of each project, just in case anyone ever has to refer back to see what happened on each job site.
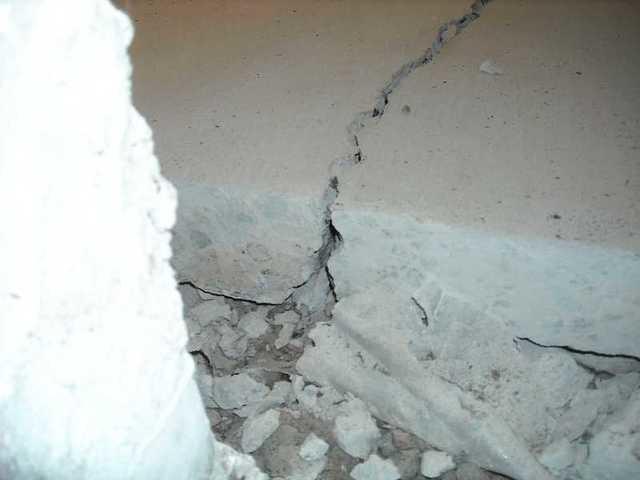
Huge crack in the floor
From the side you can see just how severe the foundation crack has become. This concrete slab is basically split into two pieces. Sometimes the cracks are actually cut open a little bit and resealed afterwards to avoid excessive rubbing.
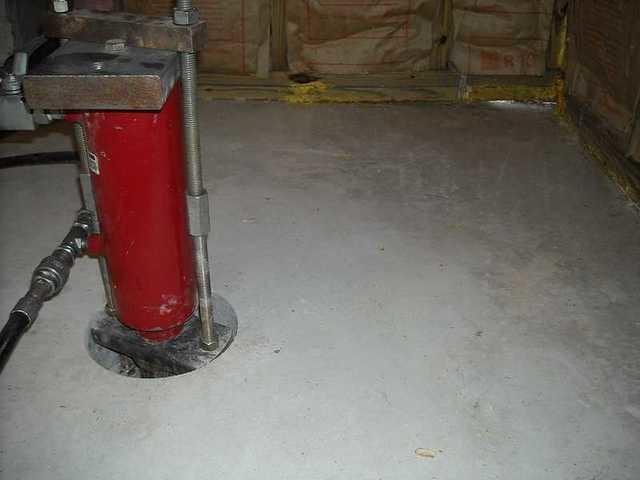
Up close on a lifting cylinder
Here you can see how the lifting equipment attaches to the pier. Each pier is pushed slowly into the ground and the pressure pushes back on the slab to achieve a lift.


